Affordable DIY Window Films: Block 99% of UV Rays with Ease
Windows serve multiple purposes in a home. They admit natural light, offer views of the outdoors, and contribute to daily comfort. However, standard glass permits significant amounts of heat, glare, and ultraviolet radiation to enter, which can damage interiors and raise energy costs. DIY window films capable of blocking up to 99 percent of UV rays provide an accessible solution. These films install with basic tools and minimal effort, turning ordinary windows into effective shields that promote efficiency and longevity.
This guide explains the advantages of window films, outlines selection criteria based on specific needs, and details the installation process. Readers gain practical knowledge on tools, techniques, and maintenance to achieve professional results. By the end, individuals understand the full value of this upgrade, including immediate and long-term benefits.
Determine Your Primary Goals for Window Film
Clarifying objectives ensures the selection of an appropriate film. Different applications address unique concerns, from protection to privacy. Consider the following priorities to narrow options.
- UV Protection and Fade Prevention: Choose films with high UV rejection ratings to safeguard furniture, carpets, and artwork from discoloration.
- Energy Savings: Opt for films that reject infrared heat to maintain cooler interiors and reduce reliance on air conditioning.
- Glare Reduction: Select lightly tinted options to soften harsh sunlight while preserving visibility.
- Privacy Enhancement: Use frosted or reflective films to prevent outside views into living spaces without darkening rooms.
- Safety Features: Select shatter-resistant films that contain glass shards in case of breakage, minimizing hazards.
Matching goals to film specifications simplifies the decision and maximizes effectiveness.
Select the Ideal Window Film for Your Home
Window films vary in material, thickness, and performance. Research products from reputable manufacturers that specify UV blockage levels and warranties. Consider window size, orientation, and exposure to sunlight when choosing.
For most homes, dual-layer films offer balanced UV and heat rejection. Verify compatibility with your window type, such as single-pane or double-pane glass. Read user reviews for insights on ease of application and durability. A well-chosen film aligns with needs and ensures reliable performance over years.
Assemble Essential Tools and Prepare the Workspace
Proper preparation streamlines installation and yields flawless results. Gather these items before beginning:
- Spray bottle with a mixture of water and mild dish soap
- Plastic squeegee or flexible smoothing tool
- Utility knife with fresh blades
- Lint-free microfiber cloths
- Measuring tape and metal straightedge
- Step ladder for reaching elevated windows
Work in a clean, dust-free environment to prevent contaminants from adhering to the film. Protect floors with drop cloths and ensure good ventilation. Organization of tools reduces interruptions and errors during the process.
Measure and Cut the Film Accurately
Precision in measurement prevents gaps or overlaps. Record the exact dimensions of each window pane, accounting for frames. Add approximately one-half inch to both width and height for trimming allowance.
Unroll the film on a flat, clean surface with the liner facing up. Align the straightedge and score the film with the utility knife for straight cuts. Replace blades as needed to avoid tearing. Label pieces if installing on multiple windows to maintain orientation.
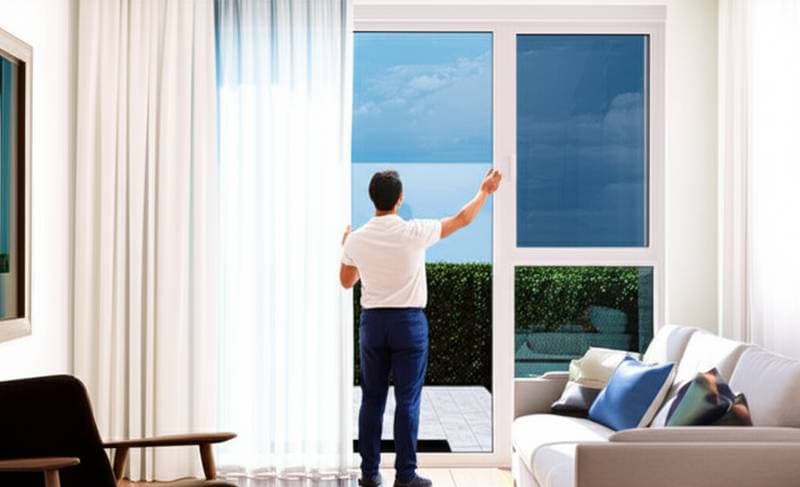
Peel, Spray, and Position the Film
Patience proves essential in this stage to avoid premature adhesion. Enlist assistance for larger sheets. Peel back a small section of the liner while spraying the adhesive side liberally with soapy solution.
Clean the glass thoroughly with the solution and a cloth to remove residue. Position the film starting from the top, allowing the solution to act as a lubricant for adjustments. Ensure even overhang on all edges before proceeding to smoothing.
Squeegee Out Moisture for a Bubble-Free Finish
Removing excess water secures adhesion and clarity. Begin at the center and work outward in firm, overlapping strokes with the squeegee. Apply moderate pressure to push solution toward the edges.
Wipe the squeegee edge with a dry cloth between passes to prevent streaks. Trim excess film with the utility knife, guiding along the frame for a clean edge. Inspect for bubbles and re-squeegee as necessary. This step eliminates imperfections and promotes a smooth appearance.
Allow Proper Curing Time
Post-installation care influences final quality. Refrain from cleaning or disturbing the film for at least 48 hours. Moisture evaporation and adhesive setting require time, typically three to seven days depending on conditions.
Haze or milkiness during curing indicates normal progress. Maintain stable indoor humidity and temperature to accelerate drying. Once clear, the film integrates seamlessly with the glass.
Experience the Key Benefits
Results manifest quickly after curing. Interiors remain cooler, with reduced solar heat gain lowering cooling demands. Glare diminishes, improving comfort for reading, working, or watching television.
Furniture and floors resist fading, preserving aesthetics and reducing replacement expenses. Energy bills decrease through enhanced insulation effects. Overall, the upgrade enhances living quality without major renovations.
Maintain Films for Optimal Performance
Regular upkeep extends film lifespan, often 10 to 15 years. Clean gently with soapy water and a soft cloth, avoiding abrasives or ammonia-based products. Address scratches or peeling promptly by reapplying solution and smoothing.
Inspect annually for edge lifting, especially in high-humidity areas. Professional removal may suit full replacements. Consistent care ensures sustained UV protection and clarity.
Integrate with Broader Energy Efficiency Efforts
Window films complement other conservation measures. Combine with thermal curtains to further insulate against temperature swings. Add weatherstripping to doors and seals around frames for airtightness.
Incorporate programmable thermostats and efficient lighting to amplify savings. This holistic approach minimizes energy use and environmental impact. Films provide quick wins while supporting comprehensive upgrades.
Evaluate Costs and Long-Term Value
Initial expenses range from 20 to 50 dollars per window, depending on size and features. Tools add minimal cost if not already owned. Installation requires only time, making it far more economical than professional services or window replacements.
Savings accrue through 20 to 30 percent reductions in cooling costs and extended interior lifespans. Property values rise with improved efficiency ratings. The investment recoups within two to three years, delivering ongoing returns.
Implement Your Window Film Project
Start by assessing windows and purchasing supplies from local or online retailers. Schedule installation on a mild day to ease handling. Follow the outlined steps methodically for success.
Track changes in comfort and bills to quantify benefits. Share experiences with others considering similar improvements. This project empowers homeowners to enhance their spaces affordably and effectively.